Install NVIDIA Jetpack
Force Recovery Mode
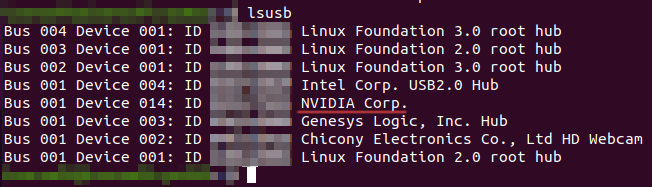
Connect the board with the Host PC using a USB Type-C data transmission cable. Put the Jetson device into Force Recovery mode. The most common way to do this is to hold the Force Recovery button while pressing the power button, or to set a jumper between the Force Recovery Pin (FC REC) and Ground (GND) before connecting power. The exact way to achieve the Force Recovery mode can be found in the respective documentation. Running lsusb should show a device NVIDIA Corp.
NVIDIA SDK Manager
Download and install the NVIDIA SDK Manager from https://developer.nvidia.com/sdk-manager. Your OS must be Ubuntu Desktop 20.04 LTS. Sign in with your NVIDIA account.
Install Configuration
 On the first installer step, make sure your board was properly detected. If the board is not detected, make sure the device is in Force Recovery Mode. Select
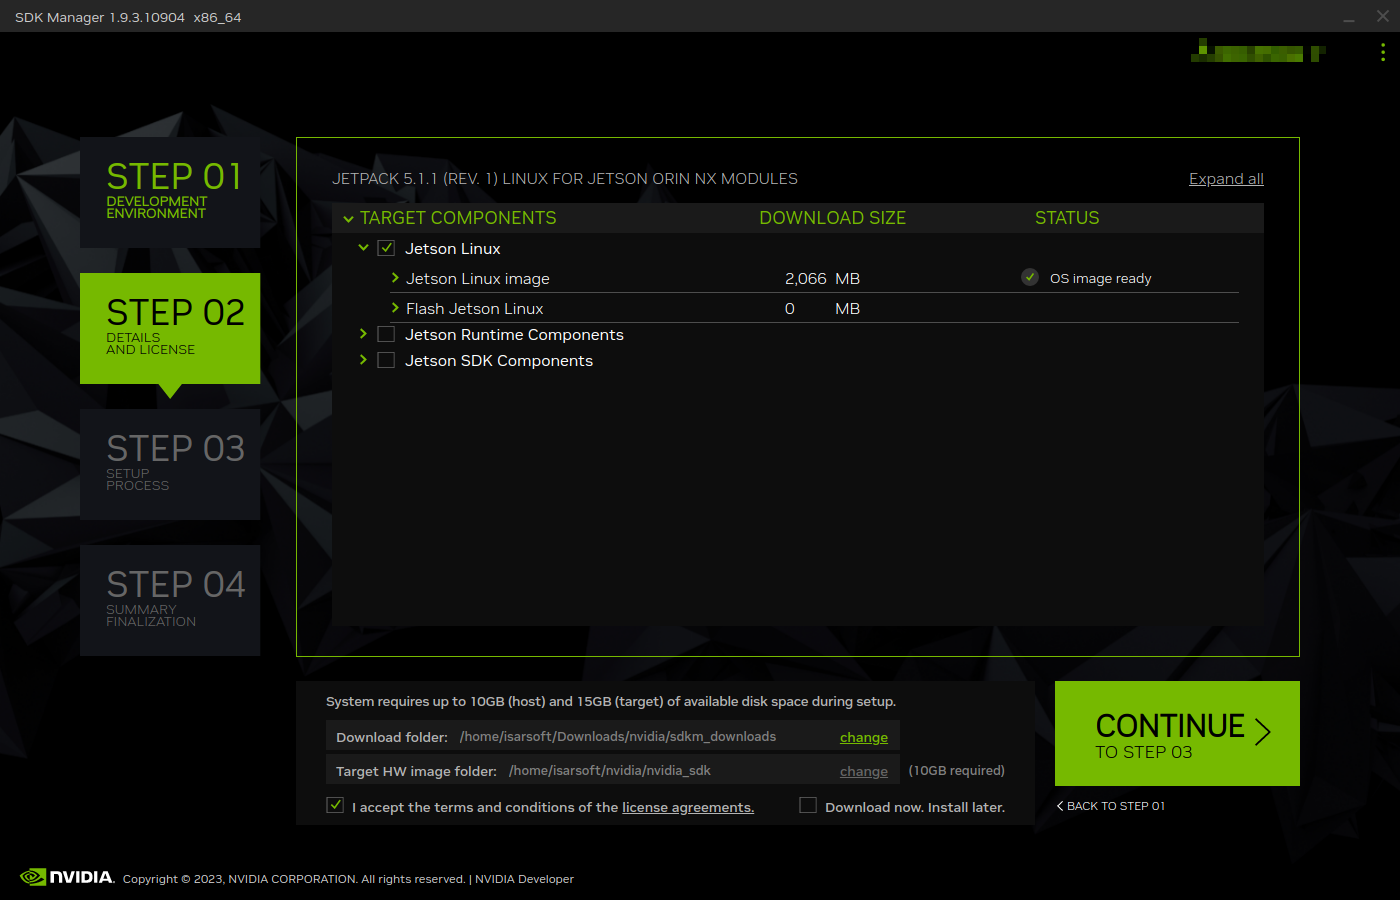
 Jetpack 5.1.1 (rev. 1) as Target Operating System. Deselect the Host Machine and deselect Deepstream.
 On the second step, deselect
 Jetson Runtime Components and Jetson SDK Components.
Setup Process
 During the third step, select
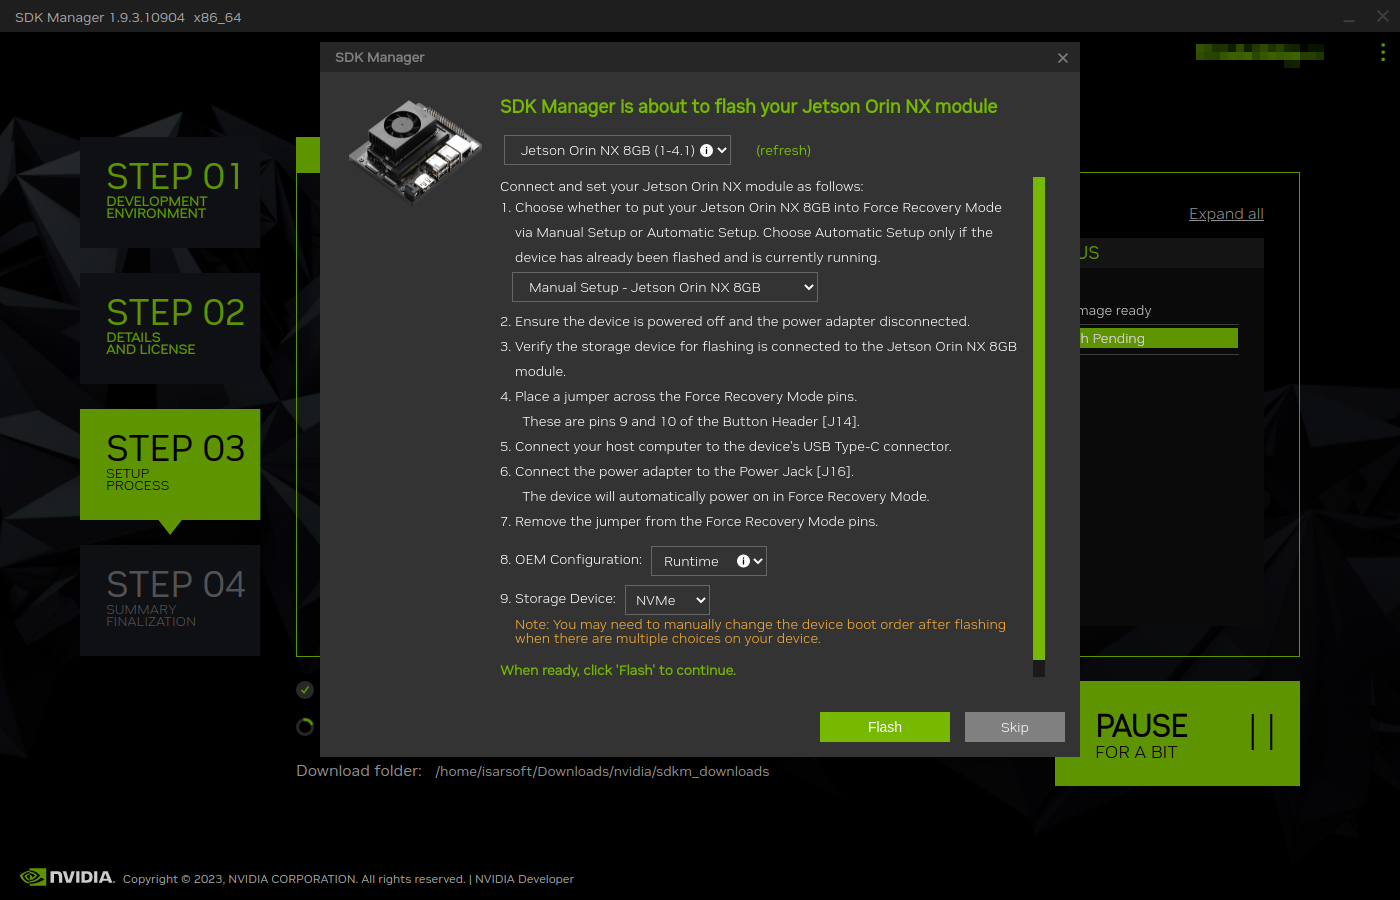
 Manual Setup and make sure the device is still properly connected and set to Force Recovery Mode.
Set the OEM Configuration to Runtime and the Storage Device to NVMe.
Warning
Setting the Storage Device to NVMe will ensure the OS is installed on the SSD instead of internal eMMC. The full installation of Isarsoft Perception will NOT fit on the internal eMMC, therefore an SSD is mandatory. If you don't have an SSD installed, make sure to do so before proceeding with the installation.
Info
If you are not planning to connect the device to a monitor via HDMI, setting the OEM Configuration to Pre-Config will allow you to set username and password directly and skip the initial Ubuntu Setup configuration. This is useful if you plan to connect via SSH only, but will not allow you to configure hostname, language, timezone, keyboard layouts, etc.
Flash Process
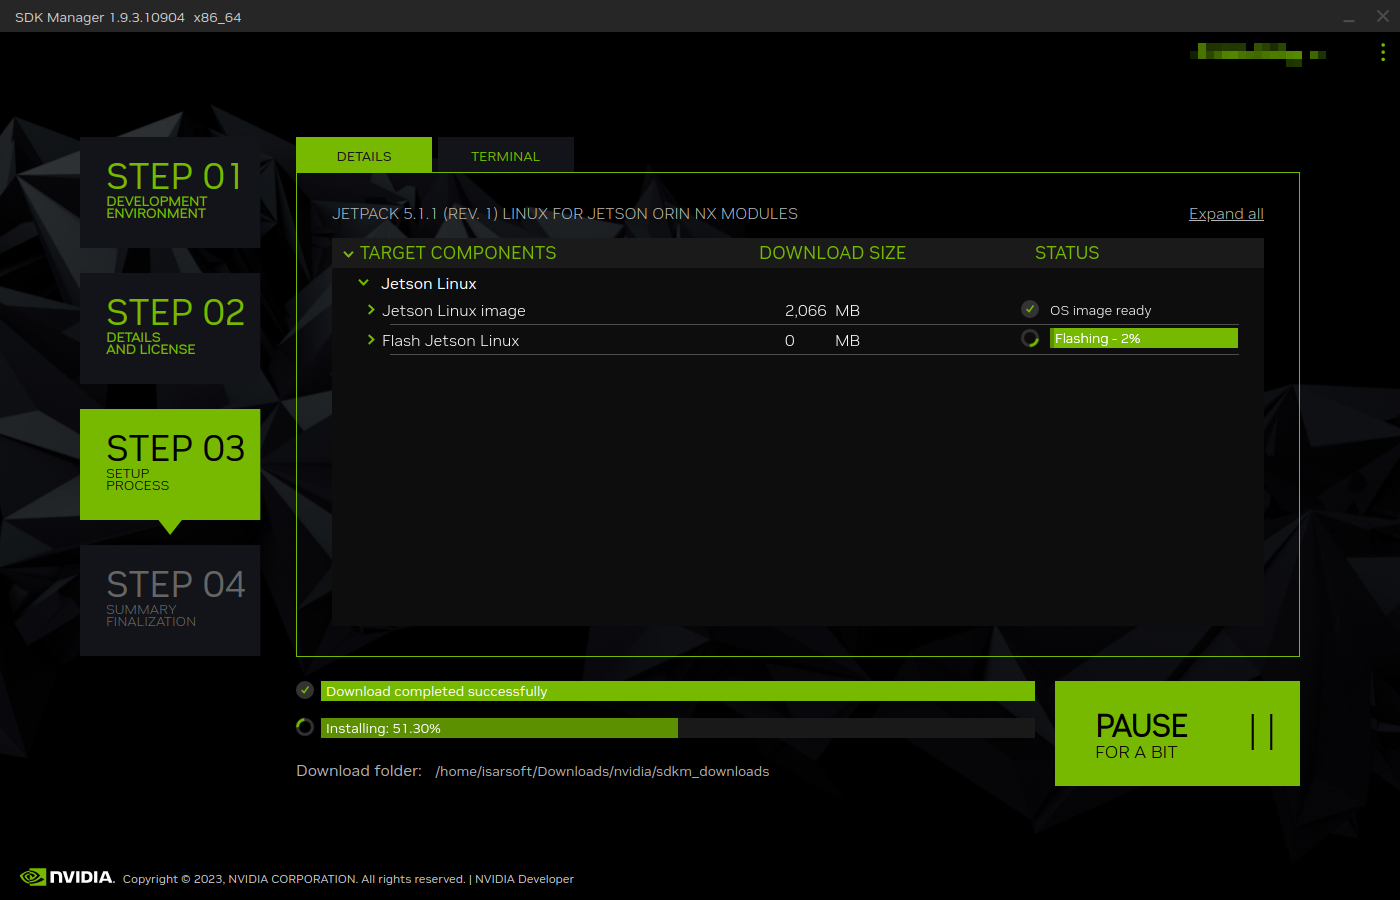 The NVIDIA SDK Manager will now proceed to flash the device. This may take a couple of minutes.
 The device is now ready and will automatically boot. Connect it to a monitor and peripherals and run through the Ubuntu Setup Dialogue to configure hostname, timezone, language and keyboard layout.
Updates
Run sudo apt update && sudo apt upgrade to receive the latest updates for the OS.
Set Power Mode and Clocks
Install the tool jtop via:
Run jtop and navigate to the 6 CTRL screen. Enable MAXN mode for full performance and also enable Jetson Clocks and set it to be enabled after each reboot. It is also recommended to set the fan profile to cool, but this will depend on the environment of operation.

Info
In case jtop is unable to set the MAXN mode, run sudo nvpmodel -m 0.
The device is now ready for installation of Isarsoft Perception.